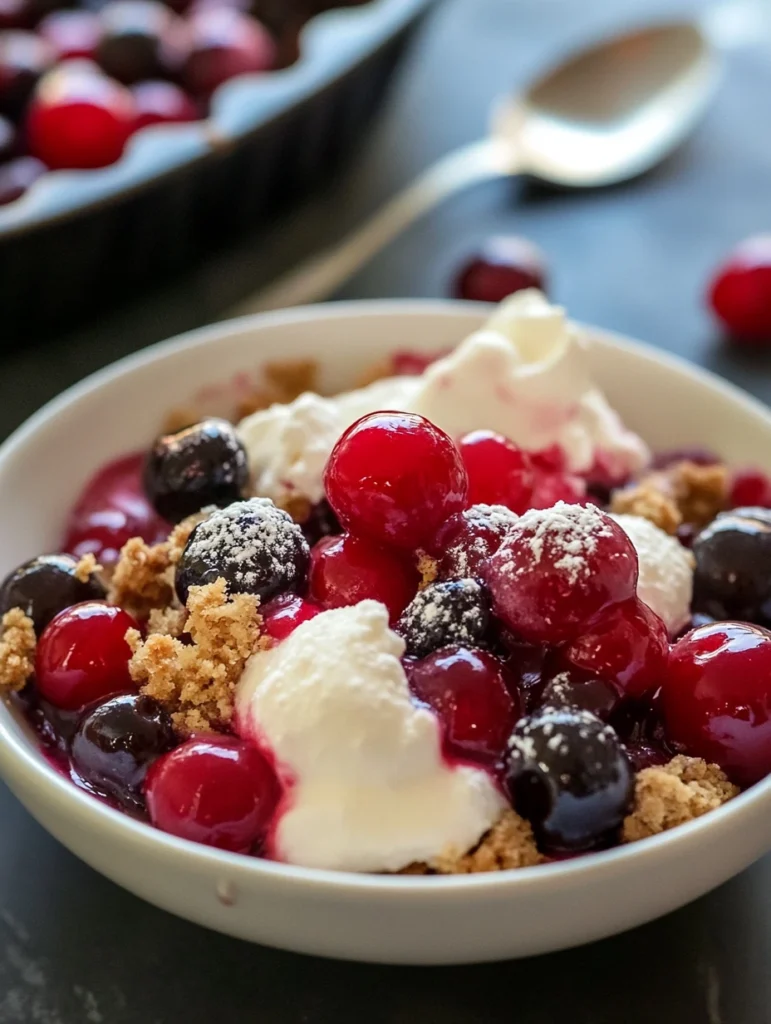
There’s a specific kind of joy that comes with the first taste of spring fruit. And when those juicy cherries hit their peak, my mind immediately goes to one place: warm, bubbly, incredibly comforting cobbler. This **Easy Spring Cherry Cobbler Recipe** is a dessert that feels like sunshine in a bowl, with just the right balance of tart fruit and sweet, tender topping.
It’s the kind of dessert that doesn’t need to be fancy to be absolutely perfect. I remember whipping this up for a casual get-together, and it vanished so fast, I barely got a second spoonful! It truly is effortless, requiring minimal prep and simple ingredients, making it your new go-to for picnics, potlucks, or just a cozy night in. It’s proof that some of the best things in life (and dessert!) are wonderfully simple.
 1")
Ready to fill your kitchen with the most amazing aroma? Let’s bake this Easy Spring Cherry Cobbler!
Before we dive in, here are the key details for this recipe:
| ⏲️ Prep Time: 15 mins | 🔥 Cook Time: 35-40 mins | ⏰ Total Time: 50-55 mins + cooling |
| 🥣 Yields: 6-8 servings | 🍳 Difficulty: Easy |
❤️ Why You’ll Absolutely Love This Cherry Cobbler
- ✅ Effortlessly Simple: With minimal ingredients and straightforward steps, this cobbler is genuinely easy enough for anyone to make.
- ✅ Perfect Sweet-Tart Balance: Juicy, slightly tart cherries are complemented by a sweet, cake-like topping.
- ✅ Incredible Texture: You get warm, bubbling fruit and a tender, golden crust – especially amazing warm with melting ice cream!
- ✅ Versatile & Adaptable: Delicious served warm or chilled, plain or with toppings, and easily adapted with other fruits or spices.
- ✅ Classic Comfort Food: This dessert just feels like a warm hug, perfect for sharing with loved ones.
🛒 Ingredients You’ll Need
Here’s everything you need to gather to make this comforting Easy Spring Cherry Cobbler. Using fresh, ripe cherries makes all the difference!
- For the Cherry Filling:
- ✅ 6 cups Fresh Cherries, pitted and halved (about 2 lbs before pitting)
- ✅ ½ cup (100g) Granulated Sugar (adjust based on cherry sweetness/tartness)
- ✅ 2 tbsp All-Purpose Flour
- ✅ 1 tbsp Fresh Lemon Juice (optional, but brightens flavor)
- ✅ Pinch of Salt
- For the Topping:
- ✅ 1 cup (130g) All-Purpose Flour, sifted
- ✅ 2 tsp Baking Powder
- ✅ ¼ tsp Salt
- ✅ ½ cup (100g) Granulated Sugar
- ✅ ½ cup (1 stick or 115g) Unsalted Butter, melted
- ✅ ½ cup (120ml) Whole Milk
- ✅ 1 tsp Pure Vanilla Extract
Ingredient Notes: If using frozen cherries, thaw them completely and drain off excess liquid before using. Using melted butter gives this cobbler a unique, slightly denser, cake-like top, which is a lovely contrast to the fruit. Learn how to easily pit cherries for the quickest prep!
🍳 Step-by-Step Instructions for Easy Spring Cherry Cobbler
Let’s get this delicious cobbler assembled and into the oven! It’s quicker than you think.
- Prep & Preheat: Preheat your oven to 375°F (190°C). Grease an 8-inch square baking dish or a similar-sized oven-safe dish (a 9-inch pie plate also works) with butter or nonstick cooking spray.
- Prepare Cherry Filling: In a large bowl, combine the pitted and halved fresh cherries, ½ cup granulated sugar, 2 tbsp all-purpose flour, optional lemon juice, and a pinch of salt. Toss gently to coat the cherries evenly. Let this mixture sit for about 5-10 minutes while you make the batter, allowing the juices to release.
- Make the Batter: In a separate medium bowl, whisk together the sifted 1 cup all-purpose flour, baking powder, and ¼ tsp salt. Add the ½ cup granulated sugar to the dry ingredients and whisk to combine. Pour in the melted unsalted butter, whole milk, and vanilla extract. Whisk just until the batter is smooth and combined. Be careful not to overmix.
- Assemble the Cobbler: Pour the cherry filling (including any juices that have collected) evenly into the bottom of the prepared baking dish. Spoon the cobbler batter on top of the cherry layer in dollops. Don’t worry about spreading it perfectly or covering all the cherries; the batter will spread as it bakes.
- Bake: Place the baking dish in the preheated oven. Bake for 35-40 minutes, or until the topping is golden brown and the cherry filling is visibly bubbling around the edges and through the gaps in the topping.
- Cool & Serve: Remove the cobbler from the oven. Let it cool on a wire rack for at least 10-15 minutes before serving. This cooling time allows the fruit juices to thicken slightly. Serve warm!
 2")
💡 Expert Tips for Success
Want to make this Easy Spring Cherry Cobbler even better? Here are some tips:
- ✅ Taste Your Cherries: Cherries vary in sweetness and tartness. Taste one before adding sugar to the filling; you may want to add a little more sugar if they are particularly tart, or slightly less if they are very sweet.
- ✅ Don’t Skip Resting the Cherries: Letting the cherries sit with sugar and flour for a few minutes allows them to release some juice, which helps create that wonderful bubbling filling texture.
- ✅ Don’t Overmix Batter: Mix the topping batter just until the dry and wet ingredients are combined. Overmixing can develop gluten and result in a tougher crust.
- ✅ Look for Bubbling: The best indicator that your cobbler is done is when the topping is golden and you see the fruit juices actively bubbling up around the sides and through the cracks in the crust. This means the fruit is cooked and the filling has thickened.
- ✅ Cool Before Serving: While you want to serve it warm, allowing it to cool for 10-15 minutes makes the fruit juices thicken slightly, preventing a completely watery filling and making it easier to scoop.
- ✅ Add a Hint of Spice: A pinch of ground cinnamon or nutmeg added to either the fruit filling or the batter can add lovely warmth that pairs well with cherries.
🍽️ Serving Suggestions
This warm Easy Spring Cherry Cobbler is truly best served warm:
- 🍦 With Ice Cream: A scoop of good quality vanilla bean ice cream melting over the warm cobbler is absolute perfection.
- ☁️ With Whipped Cream: A dollop of fresh whipped cream is another classic and delicious option.
- 🥣 On Its Own: It’s perfectly wonderful enjoyed by itself, letting the pure fruit and crust flavors shine.
- ☕ With a Drink: Pair it with a cup of coffee, tea, or a glass of cold milk.
 3")
🥡 Storage and Reheating Instructions
Storage: Store leftover Easy Spring Cherry Cobbler in the baking dish, covered tightly with plastic wrap or foil, or transfer individual servings to airtight containers. Keep refrigerated for up to 3 days. The topping will soften as it sits.
Reheating: To reheat individual servings, microwave for 30-60 seconds until warmed through. To reheat the entire cobbler, cover loosely with foil to prevent the top from browning too much, and warm in a preheated oven at 350°F (175°C) for 15-20 minutes, or until heated through and bubbling slightly.
Freezing: It’s best to freeze cobblers *before* baking. Assemble the cobbler in a freezer-safe dish, wrap it tightly in plastic wrap and then foil. Freeze for up to 3 months. To bake from frozen, remove from freezer, uncover, and bake in a preheated oven (usually 375°F/190°C) for 50-60 minutes or until golden brown and bubbling. You can also freeze baked leftovers, but the texture might be slightly softer upon thawing and reheating.
❓ Frequently Asked Questions (FAQs) about Cherry Cobbler
Can I use frozen cherries instead of fresh?
Yes, you absolutely can! Thaw the frozen cherries completely first, then drain off as much excess liquid as possible. Pat them dry with paper towels before tossing with the sugar and flour. Proceed with the recipe as written.
Can I use a different type of fruit?
Cobblers are wonderfully versatile! This recipe base works well with many fruits. Peaches, blueberries, raspberries, blackberries, apple slices, or a mix of berries are all great options. You may need to adjust the sugar amount slightly depending on the sweetness of the fruit you choose.
Why is my cobbler topping dense?
This particular cobbler topping uses melted butter and milk, resulting in a more cake-like, slightly denser topping compared to biscuit or streusel-style cobblers. This is intentional for this recipe’s texture profile! Ensure you’re not overmixing the batter, which can also lead to toughness.
How can I make the topping crispier?
This recipe produces a softer, cakey topping due to the batter style. For a crispier topping, you would need a different recipe based on a biscuit or streusel crumble topping. If you bake this recipe and want a slightly firmer top, you can try baking for an extra 5-10 minutes until it’s a deeper golden brown.
Is it okay if the fruit filling is watery?
A little liquid is expected and delicious! However, if it seems excessively watery after baking, it could be due to not letting the cherries rest long enough with the flour and sugar (the flour helps thicken juices), not baking long enough for the juices to bubble and thicken, or using frozen fruit that wasn’t drained thoroughly. Allowing the cobbler to cool slightly after baking helps the juices thicken naturally.
📖 More Recipes You Might Like
If you loved this Easy Spring Cherry Cobbler Recipe, you might also enjoy these other simple and comforting desserts from StirDelish:
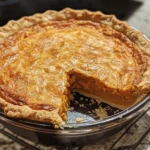
- Classic Southern Sweet Potato Pie Recipe (Family Favorite!)
- Epic Red Velvet Berry Crunch Cupcakes (Stuffed!)
- Easy Strawberry Shortcake Trifle Recipe (Showstopper!)
Final Thoughts
This Easy Spring Cherry Cobbler is more than just a recipe; it’s an invitation to slow down, enjoy the season’s bounty, and create sweet memories. The smell alone is worth making it!
I truly hope you add this Easy Spring Cherry Cobbler Recipe to your baking rotation. If you make it, please leave a comment below and let me know how much you loved it! Happy Baking!